
One of the most useful moments on a window job comes after the old frame is removed. That is when the wood behind the trim becomes visible. In Nebraska homes, Todd and the Tevelde & Co. team regularly find damage that was hidden from the homeowner’s view. That finding changes what the opening needs before a new window goes in.
Our window replacement process starts with understanding the problem you want to solve. A cold room, a sticking sash, and a water stain each call for a different inspection. The results help us plan the installation and explain the work you should expect. Here is how that process works, along with the details to prepare for before installation day.
How to Prepare Your Home for Window Replacement
The crew needs room to carry units through the house and work on both sides of the opening. Think through the route from the entry door to each window. A bedroom window behind a large bed takes more preparation than an open living room window. Move heavy furnishings in advance and confirm the space needed for your project. Before the crew arrives follow this checklist:
- • Move furniture and fragile items. Clear the requested space around each window and the paths through your home.
- • Remove window treatments as directed. Ask whether blinds, shades, curtain rods, and brackets need to come down.
- • Arrange for alarm sensors. Check with your security provider about removal and reconnection.
- • Clear exterior access. Move planters, patio furniture, and decorations beneath the windows.
- • Plan for pets and children. Choose an area away from tools and open work zones.
- • Confirm arrival and entry. Agree on parking, access, and who will be available for questions.
If a window sits above a deck, under a low roof, or behind dense shrubs, bring that up during planning. Access affects how the crew sets up for the work.
What Our Inspection Tells Us Before Installation
Finding Where the Draft Comes From
When a homeowner points out a drafty window, the inspection needs to identify where air is moving. Our window evaluations look for specific draft paths and problem areas so the repair or replacement scope addresses the source.
For example, cold air at the joint between the moving sash and frame points toward the window’s seals or fit. Air moving around the interior trim raises questions about the gap between the window frame and the wall opening. Cold glass also creates discomfort, even when there is no air leak. That distinction matters during replacement. The glass package addresses heat transfer through the window. Sealing the gap around the frame addresses air moving through the opening. Both deserve attention when the scope is prepared. Tell us where you notice the problem and when it occurs. “The lower corner feels cold on windy days” gives the inspection a useful starting point.
Understanding Why We Recommend an Installation Method
Todd starts with the condition of the existing windows and frames before recommending the installation approach. For aging or failing windows on Nebraska homes, we generally recommend full-frame replacement. It exposes the opening so its condition and existing weatherproofing receive a closer look. When the existing frame is verified to be sound, a pocket replacement is an option. The recommendation should explain what the opening needs and why. Our full-frame and pocket replacement guide covers how those findings affect the choice.
Looking at the Siding and Trim Around the Window
Tevelde & Co. handles siding and other exterior work as well as windows. That gives us a reason to look at how the opening connects to the surrounding wall. If you are planning new siding, the window decision belongs early in that discussion. Removing siding provides access to flashing and wall materials around the opening. Window depth and trim width also affect how the finished exterior looks.
For example, replacing a window soon after a siding project requires disturbing some of that finished work. Evaluating both during planning helps establish the right order and which materials need to be replaced.
What We Review Before Materials Are Ordered
At Tevelde & Co., we take measurements, discuss your goals, and review designs and the estimate before buying materials. This is the time to ask about the finished appearance and the work around each opening. A window’s size is only part of that conversation. Consider a kitchen casement window above a sink. Its opening direction, handle location, and clearance outside affect daily use. A deep frame or different interior trim also affects whether your current blinds will fit.
Before work is scheduled, confirm:
- • Which windows are included and the installation method for each.
- • Whether interior and exterior trim will be reused or replaced.
- • Whether painting, staining, or drywall touch-ups are included.
- • How old windows and debris will be removed.
- • How added repairs will be priced if concealed damage is found.
- • Who will answer questions during the project.
Clear finish details help you picture the result. “New interior trim” should lead to a discussion about its profile, width, and whether it arrives finished or needs paint after installation.
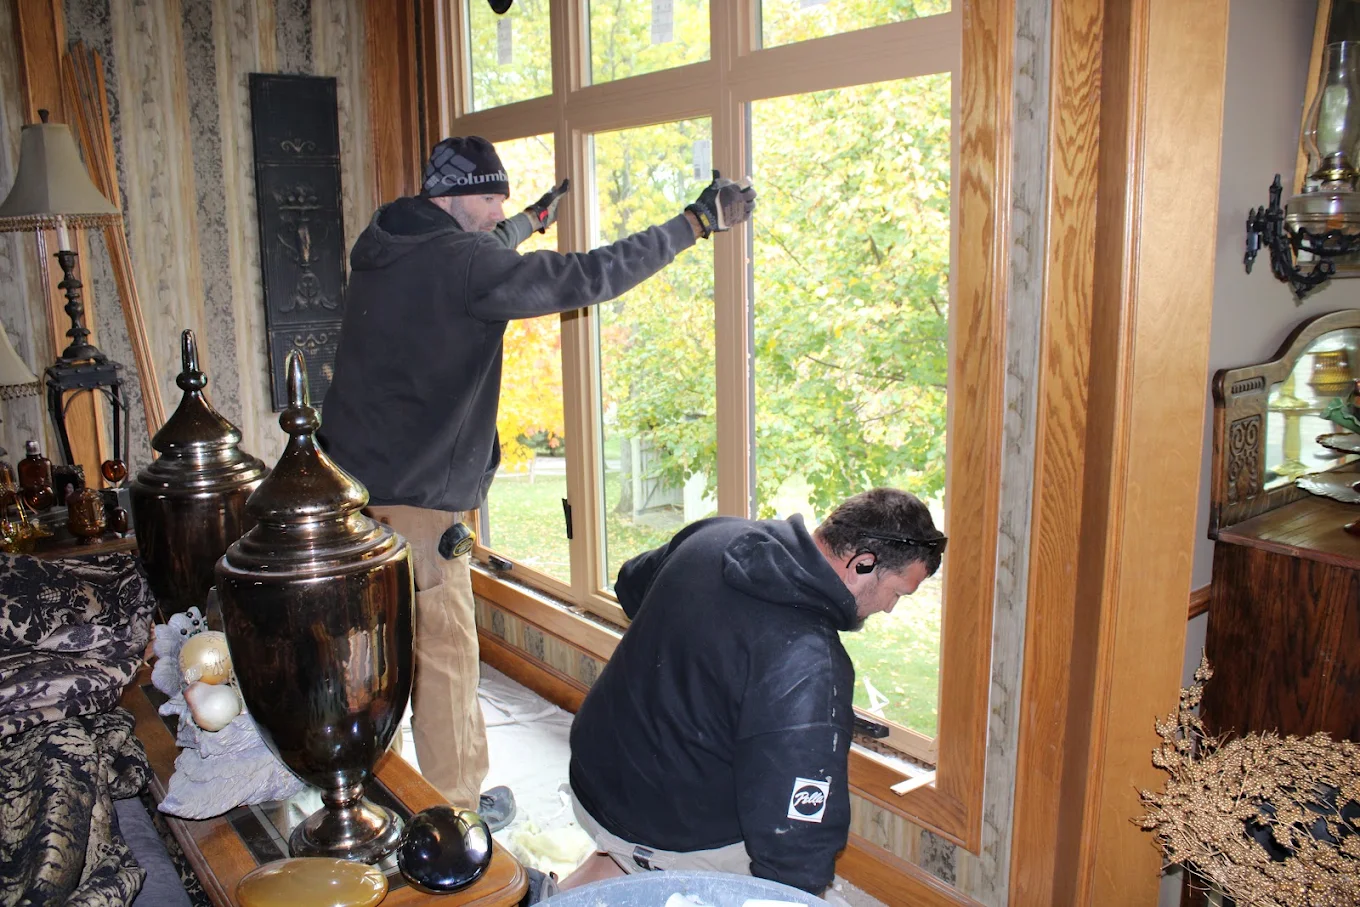
What Happens on Window Installation Day?
Removing the Old Window and Checking the Opening
For a pocket replacement, the existing frame remains. Full-frame removal gives access to the opening and the materials that were concealed by the old frame. This is where an inspection moves from visible clues to exposed conditions. A stain suggests past moisture. Once the frame is out, the condition of the wood and flashing gives a clearer picture of what needs repair.
Consider an opening with a damaged sill beneath intact interior trim. The repair needs to address the wood that supports the new window. The path that let water reach that wood also needs attention. Ask to see the opening while it is exposed. This is a useful time to understand the work before new trim covers it.
Connecting the Window to the Wall’s Drainage Layers
A replacement window needs to work with the materials around it. Flashing directs water out of the opening and connects with the wall’s drainage layers. That is why the siding and trim around a window matter during inspection. Water behind the siding needs a path back outside. Missing or poorly layered flashing leaves part of that work unresolved. Our crews follow the window manufacturer’s installation instructions, including the required flashing details. The steps depend on the product and the construction of the opening.
Setting, Sealing, and Checking the New Window
The new unit is positioned and supported with shims, which are small spacers used to hold the frame correctly. Fastening needs to keep the window level and square. A useful example is a sash that moved freely before fastening but starts to rub afterward. That calls for a check of the frame position and fasteners. Testing operation as the unit is secured helps catch that change while adjustments are accessible.
The gap between the unit and the wall opening also needs an air seal. Window-rated, low-expansion foam or another specified material closes that gap. The seal is completed before interior trim goes back on.
Finishing the Trim and Cleaning Up
After installation, the crew completes the agreed trim and exterior finish work. Review that finish against the scope, including any painting or staining still to be done. Tevelde & Co. cleans the yard at the end of each workday. On a project that spans several days, confirm where materials will remain and which areas still need to stay clear.

How Long Will the Installation Take?
Two windows of the same size sometimes need very different amounts of work. A sound existing frame is a different job from an opening with damaged wood and flashing that needs correction. These general estimates provide a starting point:
- • Straightforward pocket replacement = 1-2 hours
- • Full-frame replacement at a typical ground-floor opening = 4-6 hours (time may be needed for repairs of the surrounding opening)
The schedule for your home depends on the crew, number of openings, access, and finish work. Confirm the expected workdays for your project rather than multiplying these estimates into a promised completion date. Weather matters too. For example, flashing tape needs suitable surface conditions to bond correctly. Cold-weather installation requires products and methods that follow their application instructions. Those details affect when and how the work proceeds.
What Should You Expect While the Crew Is Working?
Expect noise, dust near the openings, and people carrying materials through the house. If you work from home, plan important calls for a room away from the installation or arrange another workspace. Rooms being worked on will have temporary exposure to outdoor air and reduced privacy. Discuss how the openings will be handled and secured through the day.
Tevelde & Co. provides daily updates about the work completed and what is planned next. Those updates help you prepare for which rooms the crew will need and raise questions while the project is underway. Keep your project contact informed about access needs. A bedroom used for daytime sleep, a pet that must remain indoors, or a meeting that requires quiet belongs in the scheduling conversation.

What Happens If Hidden Damage Changes the Work?
Concealed damage sometimes changes the scope after removal. The next step should be a clear explanation of the finding and the repair. A new window needs sound material around the opening. If water-damaged wood is exposed, the discussion should cover how much needs replacement and what caused the damage. The flashing and nearby wall materials help identify where further work is needed.
Photos taken while the opening is exposed give you a record of the condition. Keep those with the revised scope and project documents.
What We Check Before the Job Is Complete
At Tevelde & Co., the finishing checks include the spacing around the moving sash, window operation, lock engagement, and contact along the weatherstripping. These checks help confirm that the installed window operates and seals as intended. During the walkthrough, use each operable window yourself. A lock should engage with normal effort. If closing it requires pushing hard on one corner, point that out so the fit receives another look. Also review:
- • Screens and their fit.
- • Interior and exterior trim.
- • Any remaining paint or stain work.
- • Cleanup around the openings.
- • Instructions for unfamiliar hardware or tilt-in cleaning features.
Care Instructions and Warranty Support
Keep the window labels, invoice, care instructions, and installation date together. Product details make it easier to identify the unit if you need parts or service later. Ask about sealant curing time before cleaning newly sealed areas or finishing trim. Follow the manufacturer’s cleaning directions for the frame, glass, and hardware. Tevelde & Co. offers a 10-year workmanship warranty, beginning on the first day of installation. Your chosen window manufacturer provides separate product coverage. Review the terms for both and keep the service contact with your records.

Talk Through Your Window Project With Tevelde & Co.
Bring us the details you notice: where the room feels cold, which window sticks, or where water appears after rain. Those observations help focus the inspection. We’ll review the existing windows, discuss the installation approach, and explain the scope before materials are ordered. You should leave that conversation understanding what your home needs and what the work involves.
Learn more about our window replacement services or schedule your window consultation.