Step 1: The Consultation and Custom Design
The journey begins with a conversation. We do not believe in high-pressure sales tactics or one-size-fits-all solutions. Instead, we offer a free on-site consultation where we take the time to listen to your goals. During this meeting, we perform a detailed inspection of your home's current exterior and siding materials. We look for specific signs of failure like warping, cracking, and moisture infiltration that might be hiding beneath the surface.
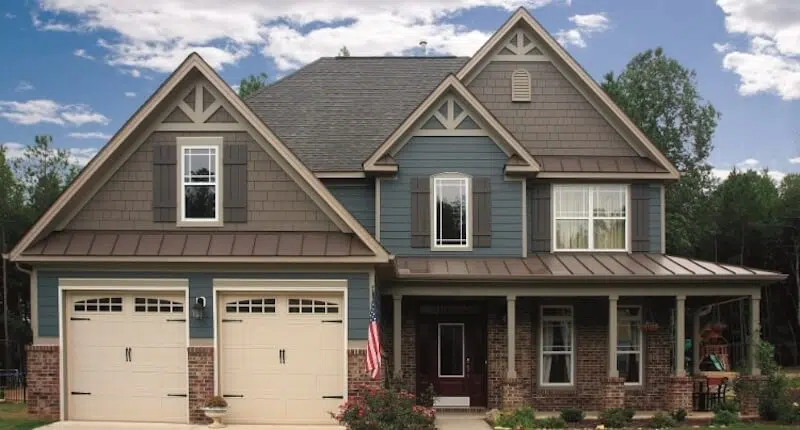
Once we understand the condition of your home's exterior, we begin a conversation about its look and design. As a James Hardie Elite Preferred Contractor, we have access to a vast array of high-quality materials and color palettes. We can guide you through the benefits of fiber cement siding, which offers incredible durability and fire resistance. If you prefer the low maintenance of vinyl, we can show you premium options from Norandex or CertainTeed.
We use advanced digital visualization tools to help you see the possibilities. We can show you how a classic lap siding would look paired with modern board-and-batten accents. This allows you to experiment with different textures and shades (such as the James Hardie Statement Collection) before any materials are ordered.
By the end of this first step in the siding replacement process, you will have a clear estimate and a design plan that fits your style and budget perfectly.
Step 2: Preparing Your Property for Success
A successful installation starts before the first piece of old siding is removed. We treat your property with the utmost respect. On the day work begins, our crew arrives to set up a staging area for siding materials and equipment. We utilize pump jacks and professional scaffolding to ensure our team can work safely and efficiently at any height.
Preparation involves more than just bringing in tools. We take active steps to protect your landscaping, flower beds, and decks. We often suggest that homeowners take a few small steps to help the process go smoothly. This might include moving patio furniture away from the house or clearing a spot in the driveway for a temporary dumpster.
Inside the home, the vibrations from the removal of old boards can occasionally cause wall hangings to shift. We recommend taking down fragile pictures or mirrors during the project. Our team handles the heavy lifting on the outside of your home, but these small preparations ensure that every part of your home stays secure while we work on the exterior skin.

Step 3: The Tear-Down and Structural Inspection
Demolition and removal of the old siding materials can be a messy project, but it is necessary for an effective siding replacement. We carefully strip away the existing layers of wood, vinyl, or metal siding. As we remove the old material, we place it directly into our disposal containers to keep your lawn clean and safe.
The most critical part of this phase happens once the walls are bare. This is the only time we can truly see the "bones" of your home. We perform a thorough inspection of the exterior sheathing to check for any underlying issues or if we will have to replace the siding after water damage. In the Nebraska climate, it is common to find areas where water has seeped in over time, leading to wood rot or mold.
If we discover structural weaknesses or damaged plywood, we address them immediately. Installing beautiful new siding over rotten wood is a recipe for future failure. We ensure that the foundation of your walls is solid, dry, and secure. This attention to detail is why we can confidently offer our 10-year workmanship warranty.

Step 4: Weatherproofing and the Moisture Barrier
Once the structural repairs are complete, we focus on creating a weather-tight envelope. This is perhaps the most important technical step in the entire process. We install a high-performance water-resistant barrier, often referred to as house wrap. This material is designed to keep liquid water out while allowing moisture vapor to escape from the inside, preventing the growth of mold within your walls.
We pay special attention to the "critical joints" of the home. This includes the areas around windows, doors, and corners. We use specialized flashing and heavy-duty tape to seal these transitions. Our crews are trained to follow the exact manufacturer specifications for James Hardie and other top brands.
In some cases, this is also an excellent time to consider insulation upgrades. If your home struggles with energy efficiency, we can discuss adding a layer of rigid foam insulation before the siding goes up. This creates a continuous thermal break that helps keep your home warmer in the winter and cooler during those humid Nebraska summers.

Step 5: Professional Installation of Your New Siding
Now, the transformation of your home's exterior truly begins to show. Our installers are experienced craftsmen who take pride in the precision of their work. Installing fiber cement is a different skill set than working with vinyl. It requires specialized cutting tools and specific fastening techniques to ensure the boards stay level and secure for decades.
We follow a meticulous layout plan. We ensure that every line is perfectly straight and that the overlaps provide the necessary protection against wind-driven rain. For homeowners who choose James Hardie with ColorPlus Technology, the finish is baked on at the factory, providing a vibrant look that resists fading and chipping far better than traditional paint.
We also install the finishing touches during this stage. This includes the trim, soffits, and fascia. These elements are the "frame" for your home’s new look. Whether we are installing mitered corners or using contrastive trim colors, we focus on a seamless finish. We want your neighbors to stop and stare (in a good way) when they walk past your house.

Step 6: Finishing Touches and Quality Assurance
The installation might be done, but our job is not finished until the site is pristine. We apply a final sealant to the home, using high-grade, color-matched caulk to all joints and penetrations. This provides an extra layer of defense against the elements and gives the project a polished, professional appearance.
We perform a thorough "magnet sweep" of your yard and driveway. This tool picks up any stray nails or metal fragments that might have fallen during the teardown or installation. We want you to be able to walk barefoot in your grass the moment we leave without a second thought.
Finally, we conduct a 360-degree walkthrough with you. We want to show you the work up close and answer any remaining questions. We take the time to explain how to maintain your new siding so it continues to look great for the next thirty years. At Tevelde and Co., our relationship with you does not end when the invoice is paid. We are here to stand behind our work long after the project is complete.
